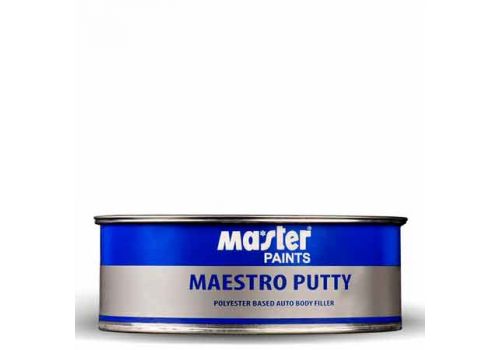
Metal putty is a versatile and powerful tool that every DIY enthusiast and professional tradesperson should have in their arsenal. Whether you’re looking to fill in gaps, repair damage, or create custom molds, metal putty filler is the go-to product that can provide durable and long-lasting solutions.
One of the key advantages of metal putty is its ability to bond and adhere to various metals such as steel, aluminum, brass, and even cast iron. With its unique formulation, metal putty creates a strong and seamless bond, ensuring that your repairs or fillings are not only aesthetically pleasing but also structurally sound.
Another noteworthy feature of metal putty is its incredible versatility. It can be used to fix a wide range of issues, from minor surface imperfections to larger gaps or cracks. Whether you’re a professional welder looking to repair a broken metal piece or a homeowner wanting to fix a damaged car part, metal putty filler offers a simple yet effective solution.
In addition to its practicality, metal putty also offers ease of use. It comes in a ready-to-use form, typically in the shape of a stick or a tube, making it convenient to apply directly to the affected area. Simply cut off a section of the putty, knead it to activate the bonding agents, and then shape it to fit your specific needs. Once applied, the putty can be sanded, drilled, or painted over, allowing for further customization and refinement of your repair or filling.
In this ultimate guide to metal putty, we will delve into the various types and brands available, explore different application techniques, and provide helpful tips and tricks to ensure successful outcomes. Whether you’re a seasoned professional or a beginner looking to dabble in metal repair, this guide will equip you with the knowledge and confidence to unleash the full potential of metal putty and achieve outstanding results. So let’s dive in and discover the endless possibilities that metal putty has to offer!
Choosing the Right Metal Putty for Your Project
When it comes to filling and fixing, choosing the right metal putty is crucial for the success of your project. The market offers a variety of options, each with its own unique features and advantages. Understanding the properties of different metal putty fillers will help you make an informed decision and achieve the best results.
-
Epoxy-based Metal Putty: Epoxy-based metal putty is a popular choice due to its excellent adhesive properties and high strength. This type of metal putty filler is ideal for bonding different metal surfaces together, as well as for filling cracks, holes, and other imperfections. It is known for its durability and resistance to moisture, chemicals, and heat.
-
Steel-reinforced Metal Putty: Steel-reinforced metal putty is specifically designed to provide exceptional strength, making it a suitable option for heavy-duty applications. This type of putty filler contains steel fibers or particles, which enhance its load-bearing capabilities and make it highly resistant to impact and vibrations. It is commonly used for repairing metal components under extreme stress conditions.
-
Aluminum-based Metal Putty: Aluminum-based metal putty is known for its lightweight and corrosion-resistant properties. It is ideal for repairing aluminum surfaces, as well as for bonding aluminum with other metals. This type of metal putty filler offers excellent adhesion and is often used in automotive and aerospace industries, where weight reduction and durability are of utmost importance.

Carefully consider the requirements of your project before selecting a metal putty filler. Evaluate factors such as the type of metal you are working with, the nature of the repair or filling task, as well as the environmental conditions the project will be subjected to. By choosing the right metal putty, you can ensure a strong and long-lasting repair or filling solution.
Preparing the Surface for Metal Putty Application
When it comes to using metal putty for filling and fixing, proper surface preparation is crucial for ensuring a successful and long-lasting repair. Before applying the metal putty filler, it’s important to follow these steps to prep the surface:
-
Clean the Area: Begin by thoroughly cleaning the surface where the metal putty will be applied. Remove any dirt, dust, grease, or loose particles using a mild detergent or solvent. This will help the putty adhere better and prevent any interference with the bonding process.
-
Sanding the Surface: Use sandpaper or a sanding block to roughen up the surface gently. This step is particularly important when dealing with smooth or glossy surfaces, as it helps create a better bond between the metal putty and the substrate. Be sure to sand evenly and remove any existing paint or coatings that may hinder the adhesion.
-
Degrease and Dry: After sanding, wipe the surface with a clean cloth dampened with a suitable degreaser or alcohol solution. This will remove any residual oils or contaminants that may be present. Allow the surface to dry completely before proceeding to apply the metal putty filler.
By carefully preparing the surface before applying metal putty, you can enhance its effectiveness and ensure a strong bond. This step-by-step process will help you achieve professional-looking results for your filling and fixing projects.
Tips for Filling and Fixing with Metal Putty
-
Start with a Clean and Dry Surface
Before you begin filling or fixing with metal putty, it’s essential to ensure that the surface you’re working on is clean and dry. Any dirt, grease, or moisture can interfere with the effectiveness of the putty. Use a soft cloth or a mild cleaning solution to remove any debris, and allow the surface to dry completely before applying the metal putty. -
Apply the Putty Evenly and Smoothly
When applying metal putty, it’s important to do so in a consistent and even manner. This will help achieve a smooth and seamless finish once the putty has dried. Begin by squeezing out a small amount of putty onto a clean surface, and then use a putty knife or a similar tool to apply it to the desired area. Spread the putty evenly, ensuring proper coverage and avoiding any lumps or bumps. -
Allow Sufficient Drying and Curing Time
Patience is key when it comes to using metal putty filler. After you have applied the putty, give it enough time to dry and cure fully before subjecting it to any stress or strain. Follow the manufacturer’s instructions for specific drying times, as they may vary depending on the type and brand of metal putty. Rushing the drying process can result in a less reliable bond and compromise the effectiveness of the repair or filling.
Remember, metal putty can be a versatile and handy tool for various filling and fixing needs. With these tips in mind, you can effectively unleash the power of metal putty and achieve professional-looking results.


